


Hey!
Welcome to another one of our blogs on configuring the new Cisco Catalyst 9800 WLC.
This time we are going to take you through configuring 2 x C9800-CLs for redundancy HA SSO.
First here is an overview of my home lab setup:

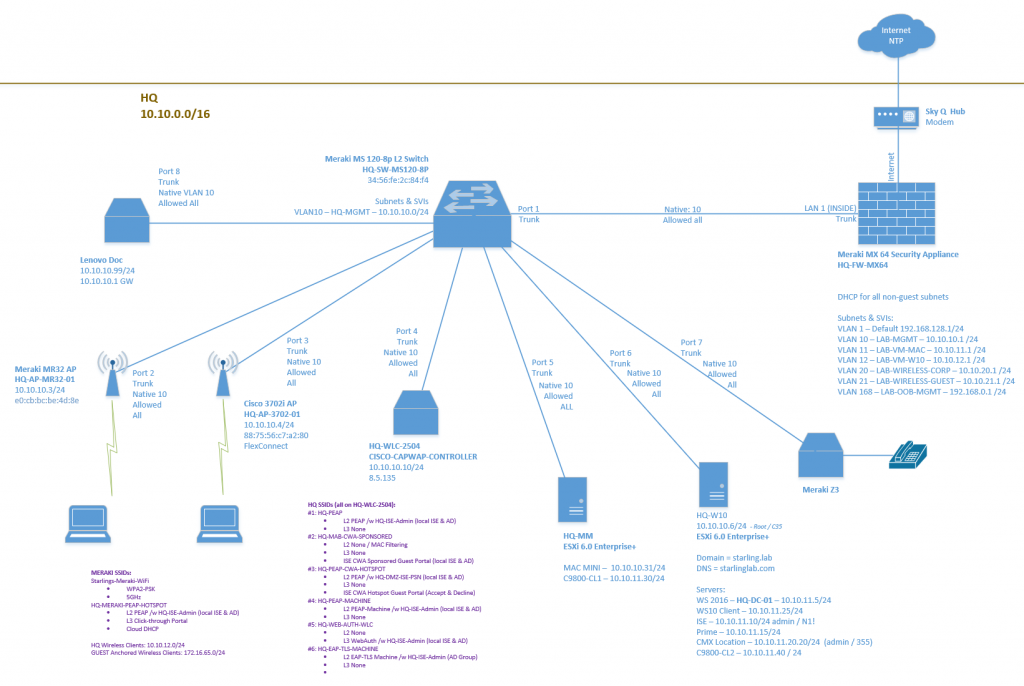
I currently have 2 x ESXi servers and a C9800CL on each of them – what it is important to point out below here is that I have VLAN 12 configured to use for my L2 redundancy ports between the WLCs.


Interface Gigabit Ethernet 3 will be used for the L2 HA in this setup:

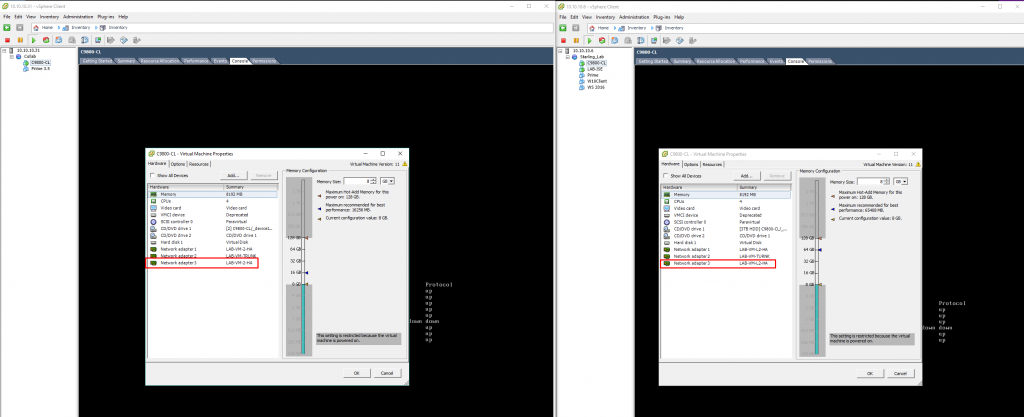
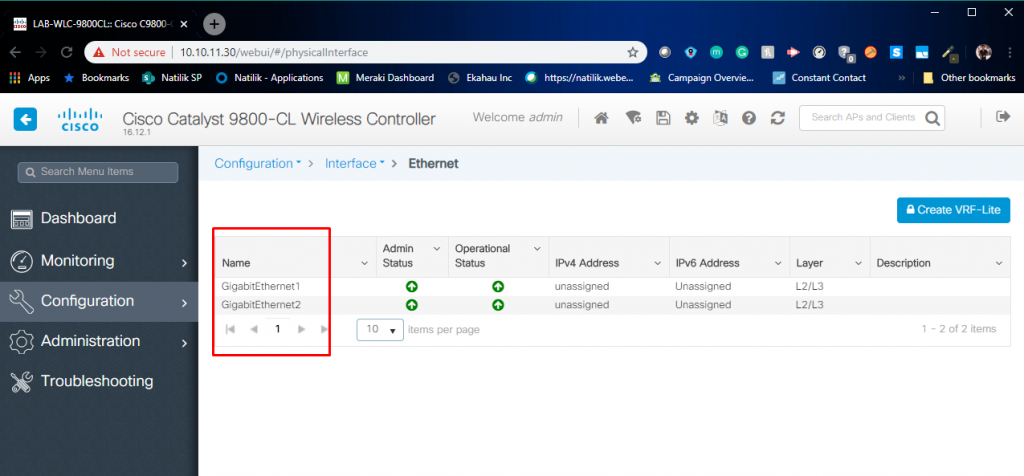
Just want to point out here that at this stage we have 3 x interfaces – Gigabit Ethernet 1 – 3:


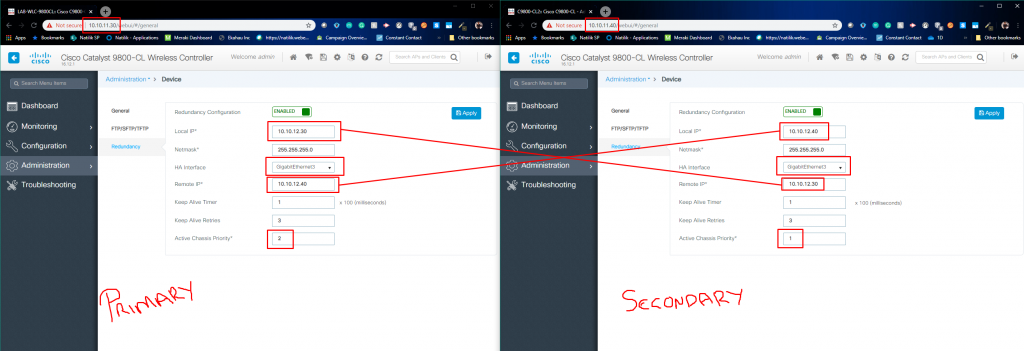
I then began the redundancy configuration on both of the WLCs.
On the primary WLC I specified the “local IP” as the IP address I had just set up on VLAN 12 and the remote IP address of the secondary WLC that I had just created on VLAN 12.
HA interface I have used Gigabit Ethernet 3.
I wanted the WLC on the left to be the primary WLC so I set the active chassis priority to higher than the secondary WLC on the right:

After I applied the configuration I then saved the config and reloaded both of the WLCs at the same time, crossed my fingers and prayed to the wireless networking gods! 😀

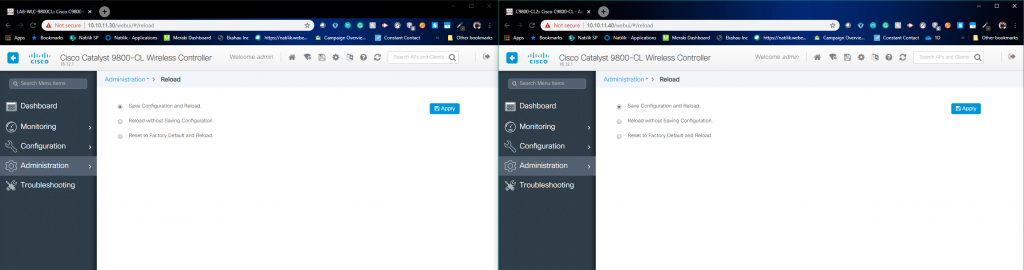
A few minutes later…

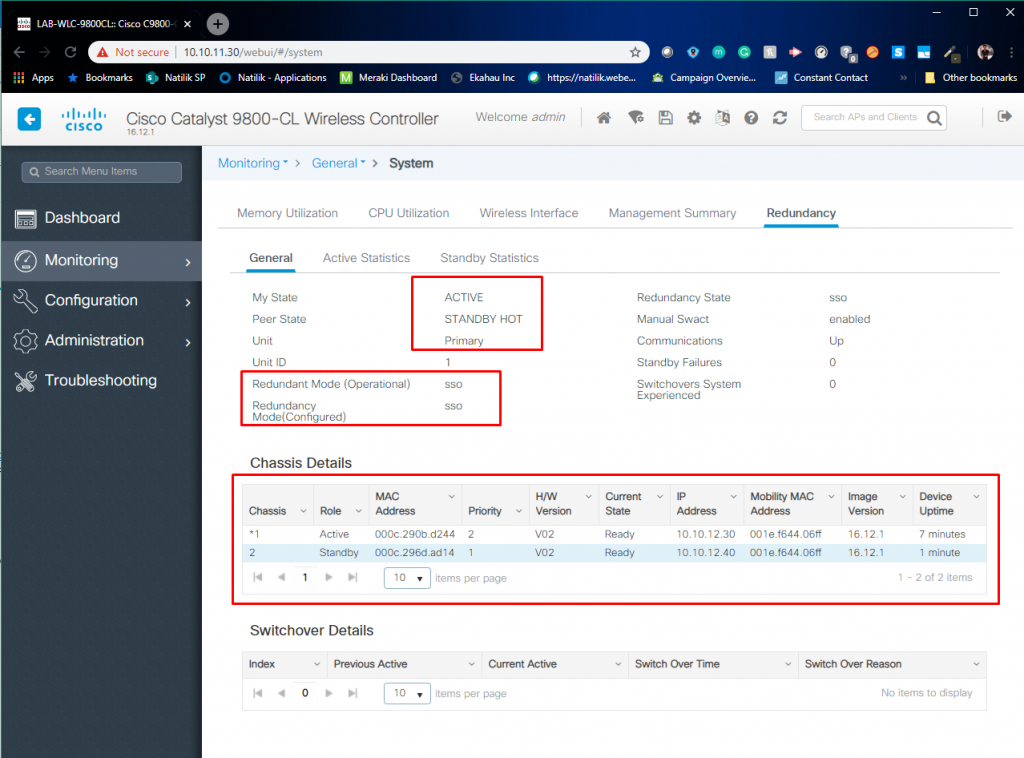
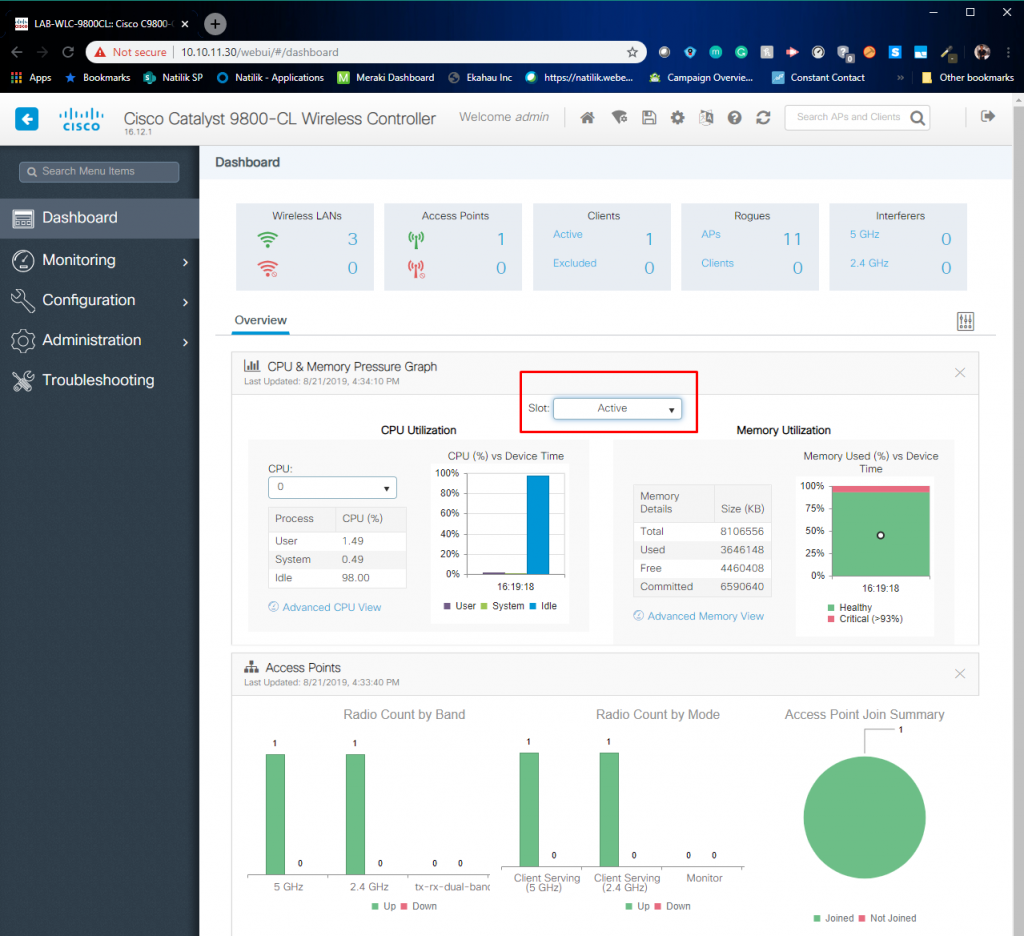
We can see now that the WLCs have rebooted and successfully formed an HA SSO pair. You can now also see a new dropdown on the dashboard to flip between active and standby stats:

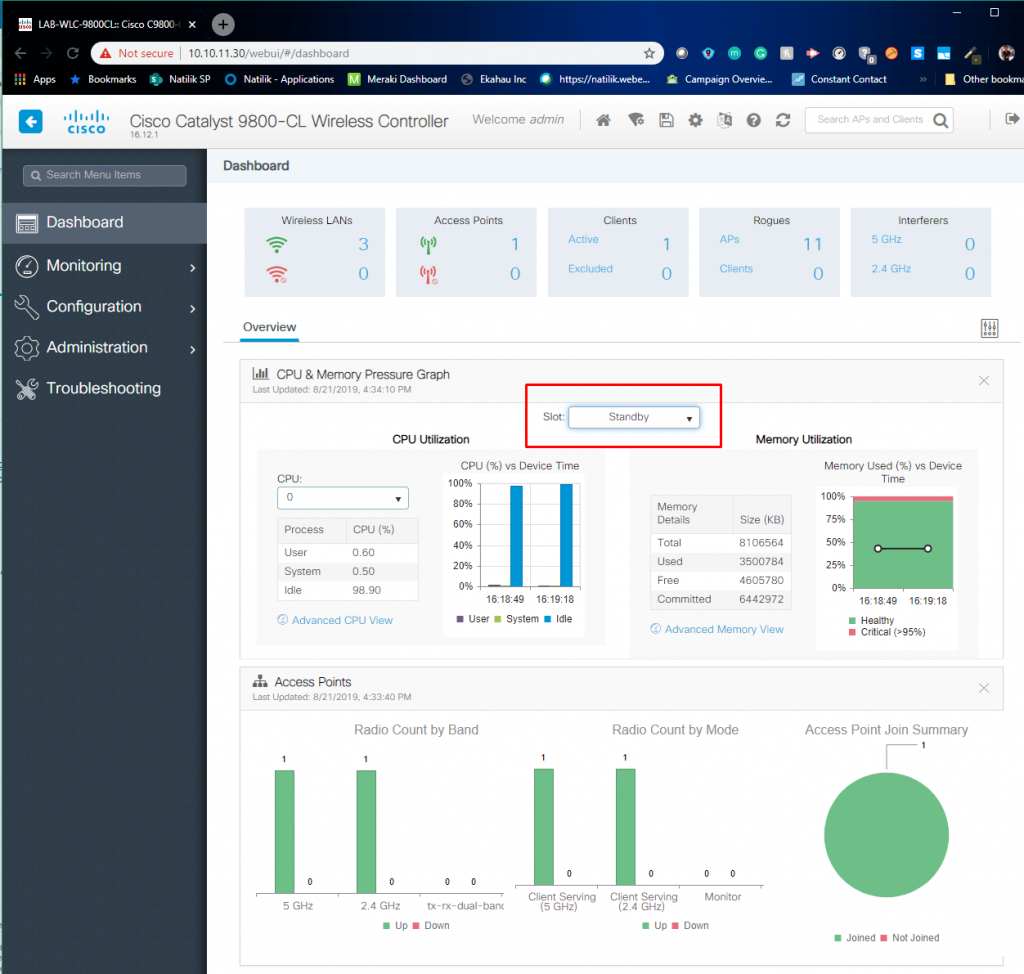
Standby stats:

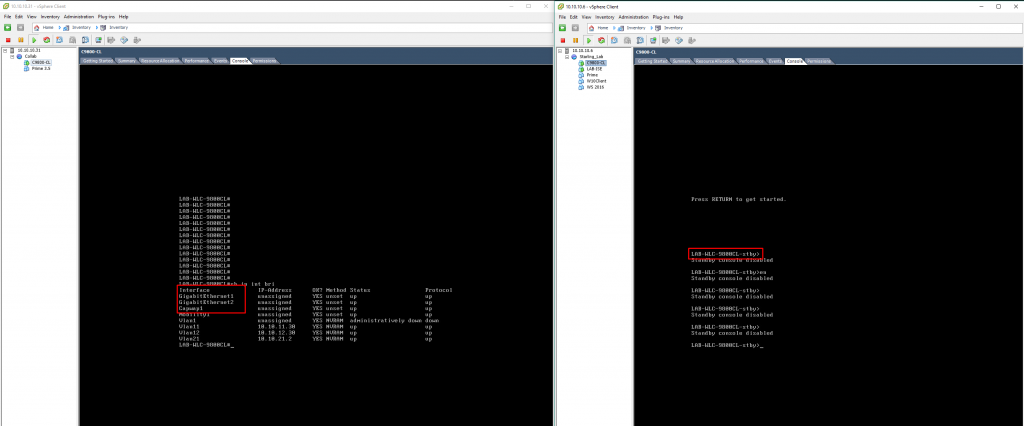
Note the G3 interface is gone after forming a HA:


Also note that HA/SSO is required to take advantage of a very nice new featur of the C9800 series WLCs, which is the “always on” feature from its hitless upgrades.
Here is how it works:
- The controller automatically selects groups of APs that can be upgraded, while other nearby APs will still provide coverage to the clients
- RRM is used to determine AP neighbors that can provide redundant client coverage
- The aggressiveness of these groupings is configurable.
- You can have many groups (few APs per group), with very minimal coverage impact, but it will take a long time to complete.
- Or you can have fewer groups (more APs per group) with a greater chance for coverage impact but will complete much more quickly
- The secondary Controller is upgraded to the new software version and rebooted
- The controller uses 802.11v to shuffle clients away from the APs in the first group so that they can be rebooted without impacting the clients
- Clients not supporting 802.11v will get ungracefully kicked off the AP
- The controller moves those APs to the new controller, thus upgrading the AP code when they join
- Once upgraded and controller-joined, clients may join these APs
- The same process is automatically repeated for all successive groups of APs
- Once all APs are moved to the N+1 controller, the code is upgraded on the primary controller and it is rebooted
- Once the primary controller is back online, the APs can optionally be moved back to the primary controller
There you go – that is how you set up and configure your virtual C9800CLs for HA/SSO – hopefully this blog saves you a bit of time if you ever need to do something similar!
PS. Shout out to Ashley Georgeson who helped with this 🙂