


It’s simple, right? Sure! Took me a while to figure that one out.
Our goal in this post is to demo Cisco Catalyst 9800 WLC FlexConnect Configuration.
It’s assumed you’re familiar with all C9800 solution building blocks (we’ve covered it before here) but if it’s your first time, here is very quick recap:


And this is the lab. Note that VLAN 20 is now removed from the ESXi Trunk on the switch port G0/7. It is no longer needed as the AP plugged to port G0/1 will be dropping users’ data locally now.

Pre-reqs
- Since we’re leveraging FlexConnect local switching (AP puts wireless users into the network, data traffic is no longer tunneled back to the C9800 WLC), AP trunk must allow vlan 20 (that is a wireless users VLAN, local to the AP)
- C9800-CL VM is freshly deployed as shown here or it is configured for central switching as shown here
- C9800 can communicate with the network; wireless management interface (VLAN 11 in this example) is up
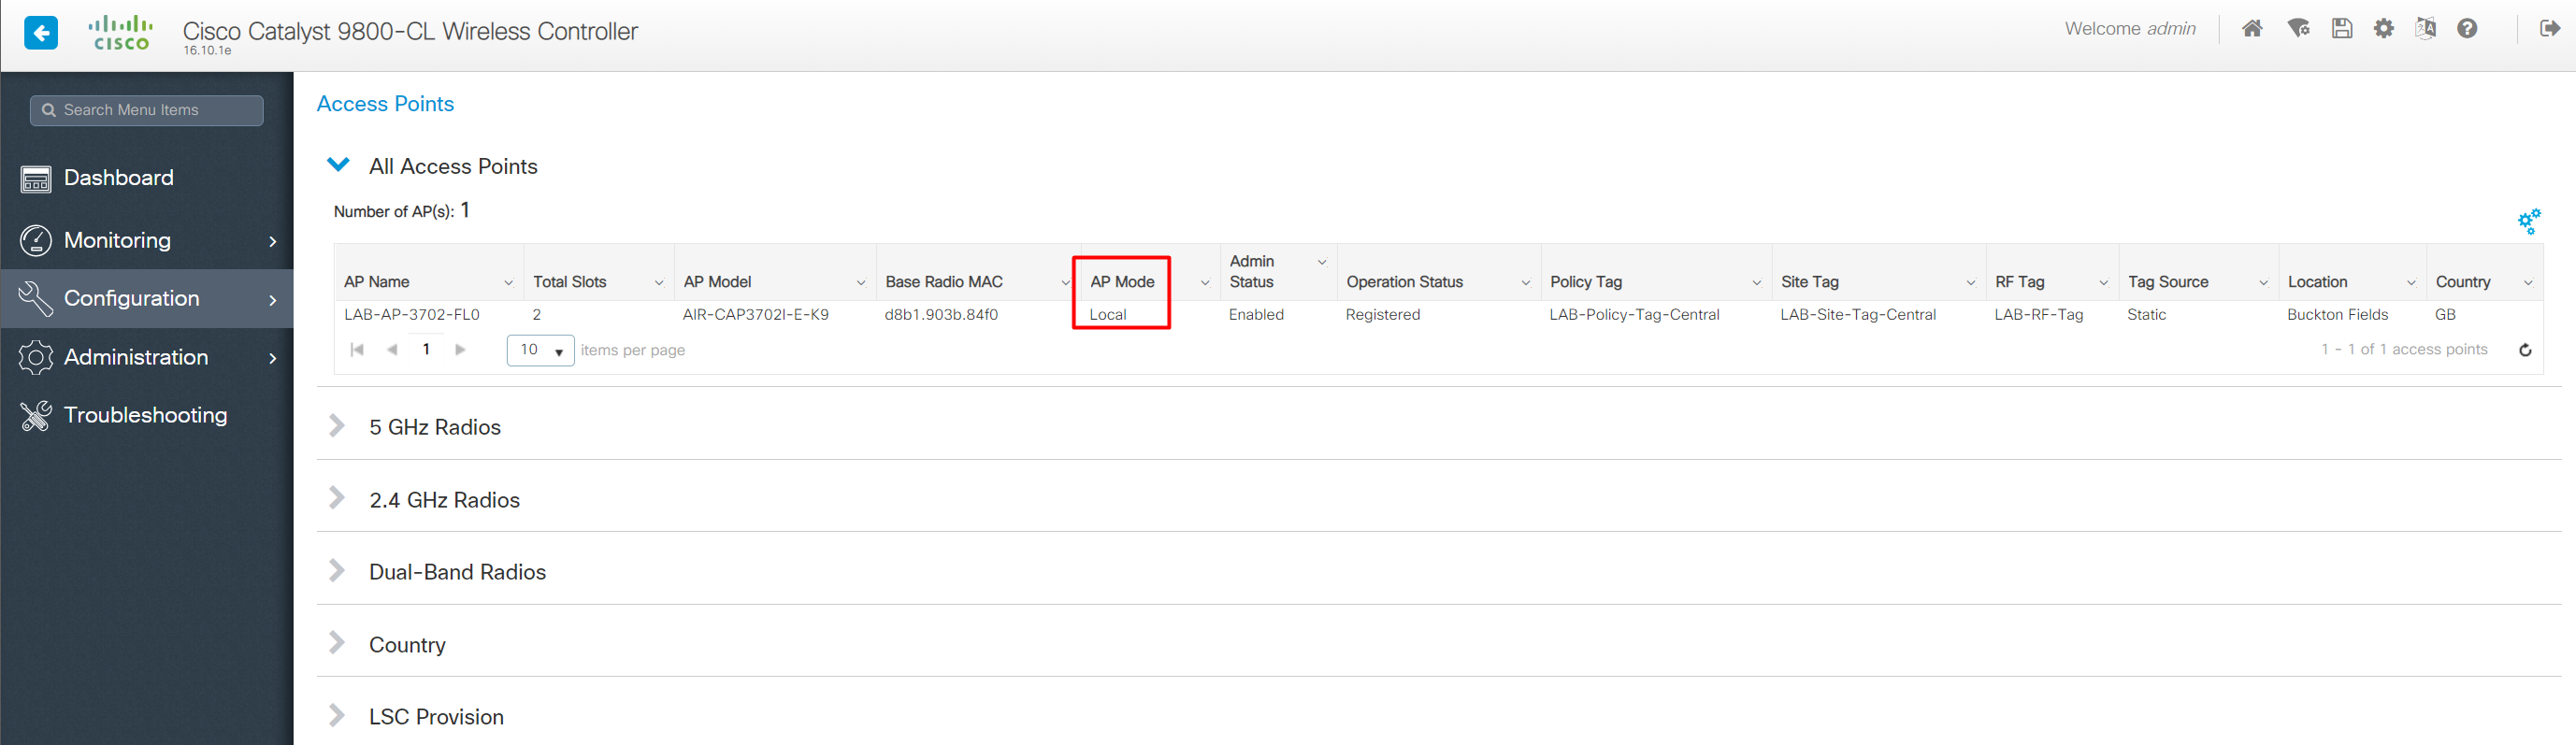
- AP is registered to the C9800
In this example, we still have my AP registered as ‘local’ (central switching), centrally switched SSID is up, my phone is associated and has full access following the ‘central switching deployment’ blog here.

The only places where the config is different between Central and Flex are:
- Policy Profile – sets SSID set to local switching and maps to a local VLAN
- Flex Profile – defines AP Flex attributes like AP Native VLAN, Local Auth and AP Local VLANs are specified here
- Site Tag – tells the AP to join as Flex and use specific Flex Profile
I’ll put more wording around the above only, as we’ve already covered all other relevant details in the ‘centrally switched’ blog post here.
Steps
This is how we registered AP as Flex and configured locally switched Flex WLAN.
1. Clean up the config
For simplicity, I just deleted all Profiles and Tags except of RF Profile and RF Tag (and that’s it, I didn’t delete anything else; still, don’t worry if you start with a fresh blank config :))
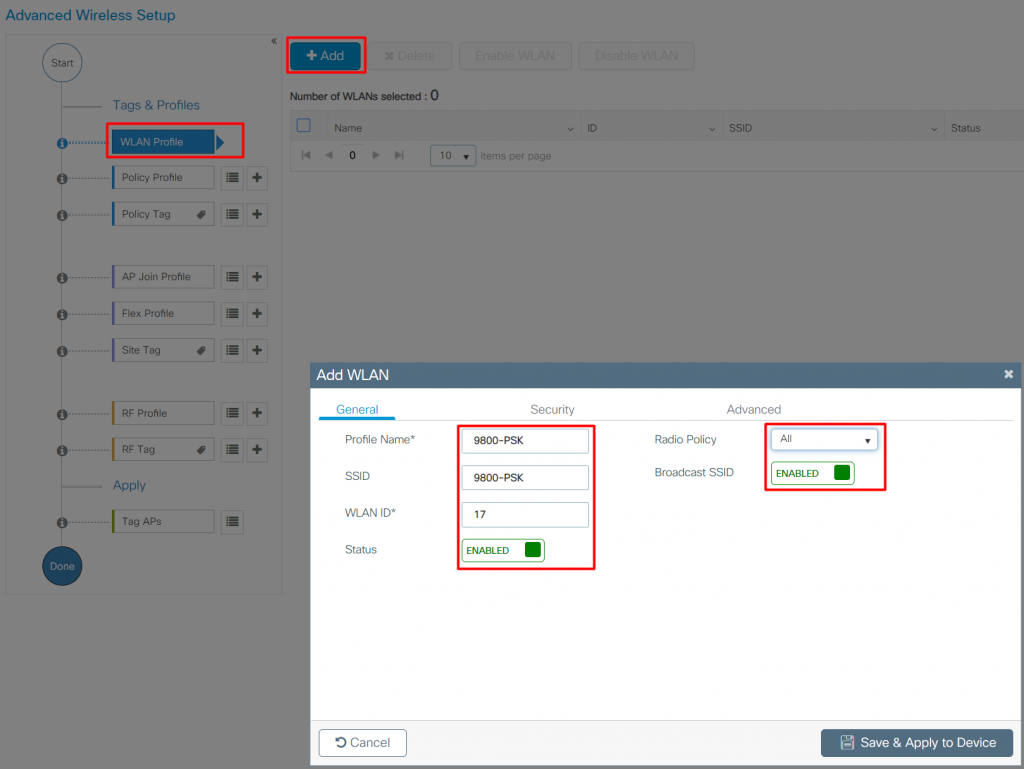
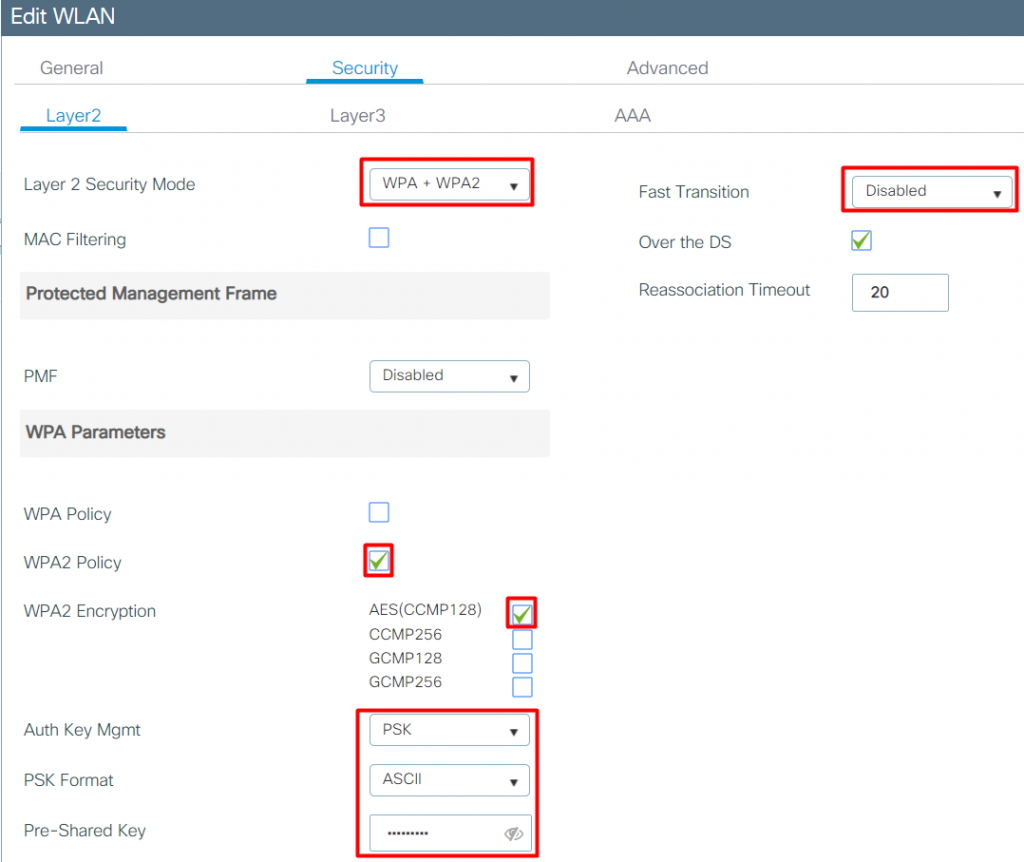
2. Create new WLAN profile


3. Create Policy Profile

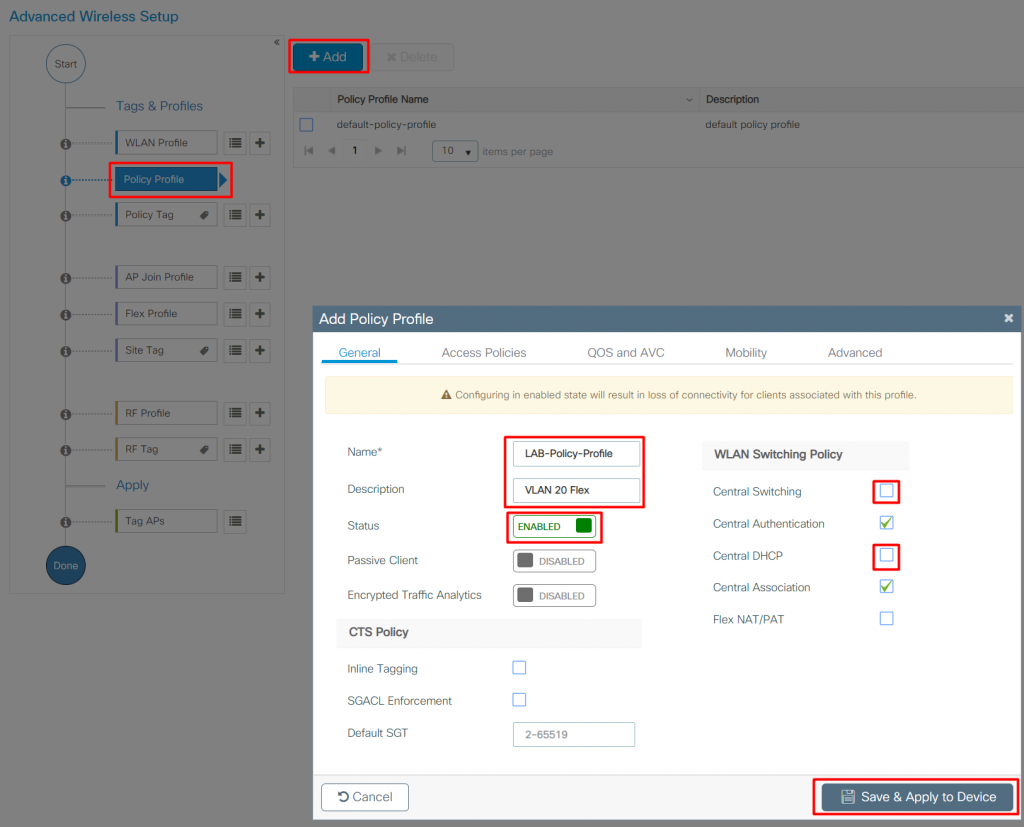
“Central Switching” must be unticked to enable Flex Connect Local Switching; it also makes sense to untick “Central DHCP” as we’re probably happier with DHCP process being handled locally and not via a WLC. I also like to include the VLAN ID that we are mapping this Policy Profile to in the Name or Description, as we might have more Policy Profiles mapping different VLANs for different WLANs and it’s good to know what policy does what just by glancing at its name or description.

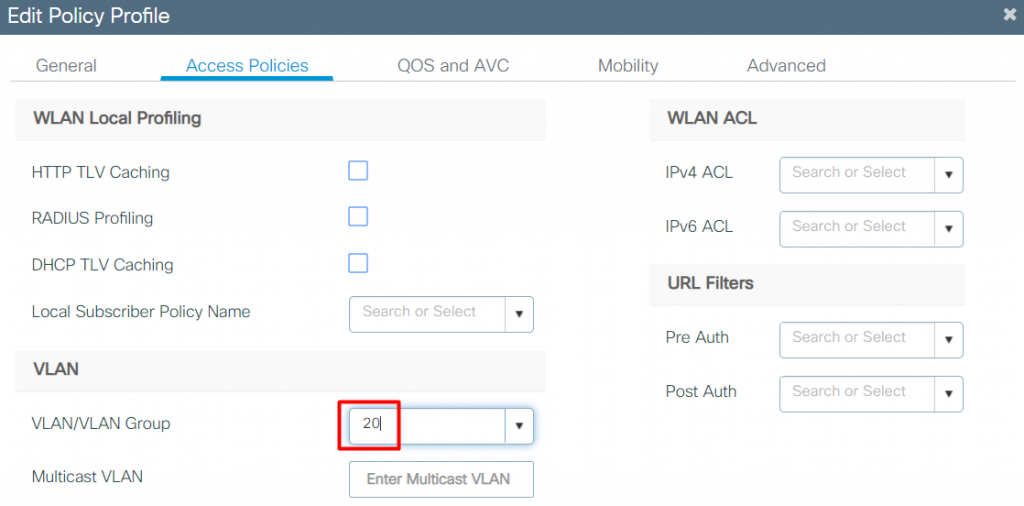
“VLAN/VLAN Group” is where you map WLAN to a VLAN! There is no direct equivalent to that mapping as we know from the AireOS. Please note that if you create a VLAN & name it (either through CLI: (config)# vlan 20; (config-vlan)# name LAB-WIRELESS-USERS or GUI: Configuration > Layer2 > VLAN) and use VLAN name to refer to it in a Policy Profile, it WILL NOT WORK! You must refer to a VLAN via its ID (and not a name, since it doesn’t exist on the AP!). If you want to refer a VLAN name here, you must specify 100% matching VLAN ID and corresponding VLAN name in the Flex Profile. See “Flex Profile” section below for more details.
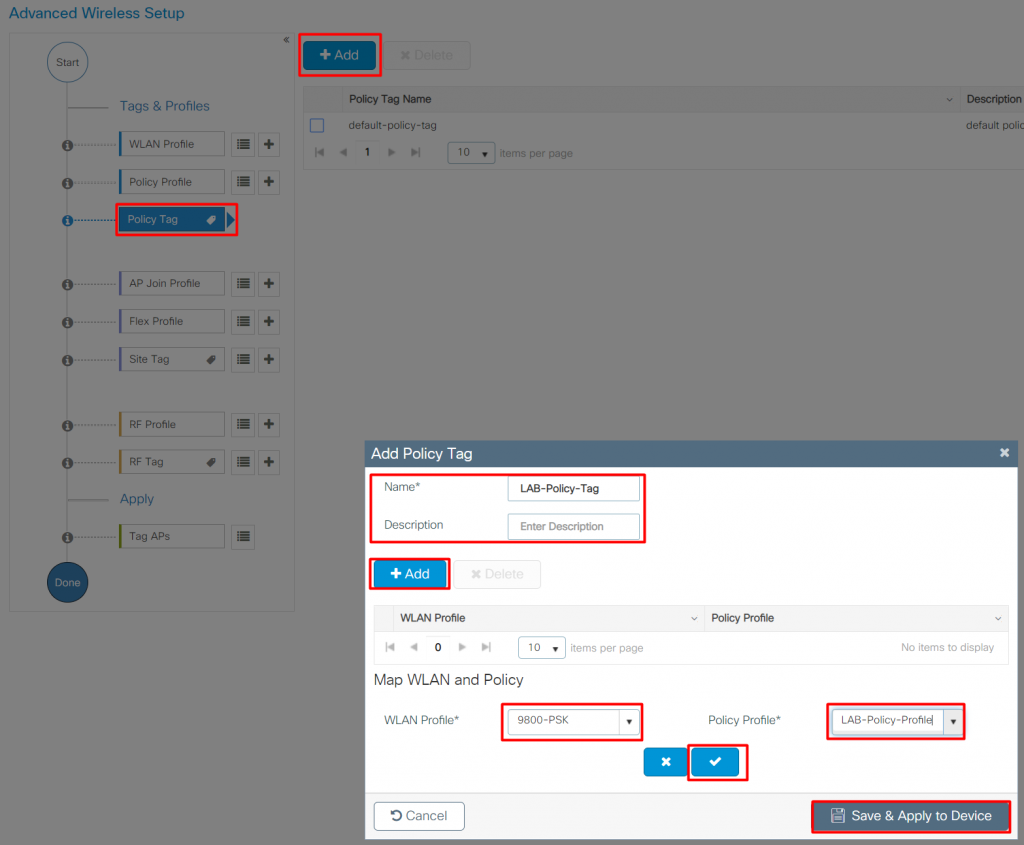
4. Create Policy Tag

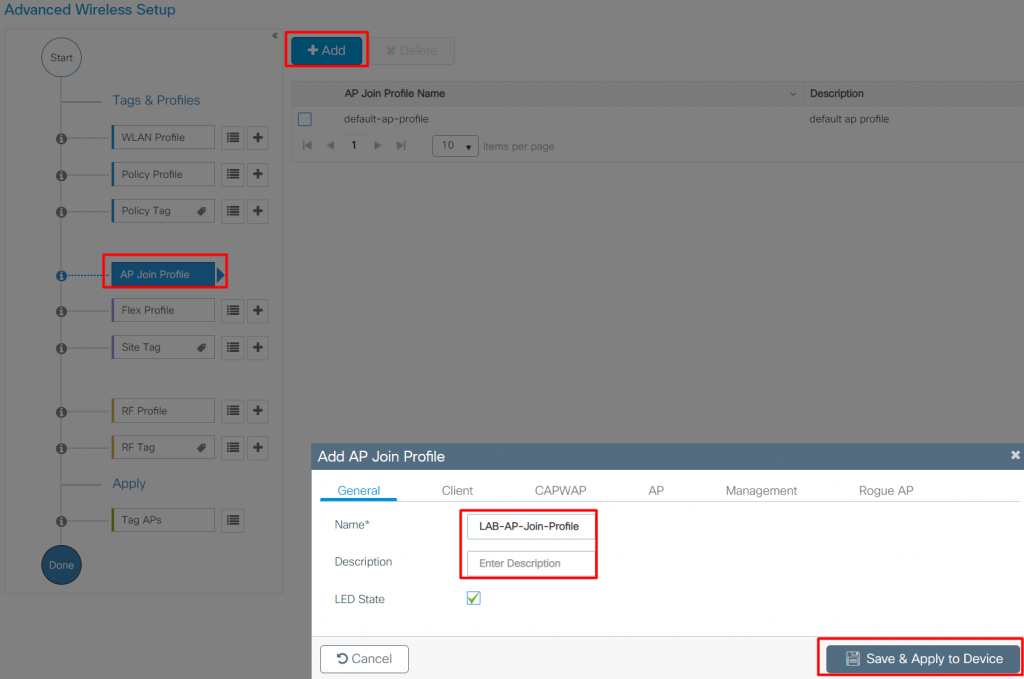
5. Create AP Join Profile

6. Create Flex Profile

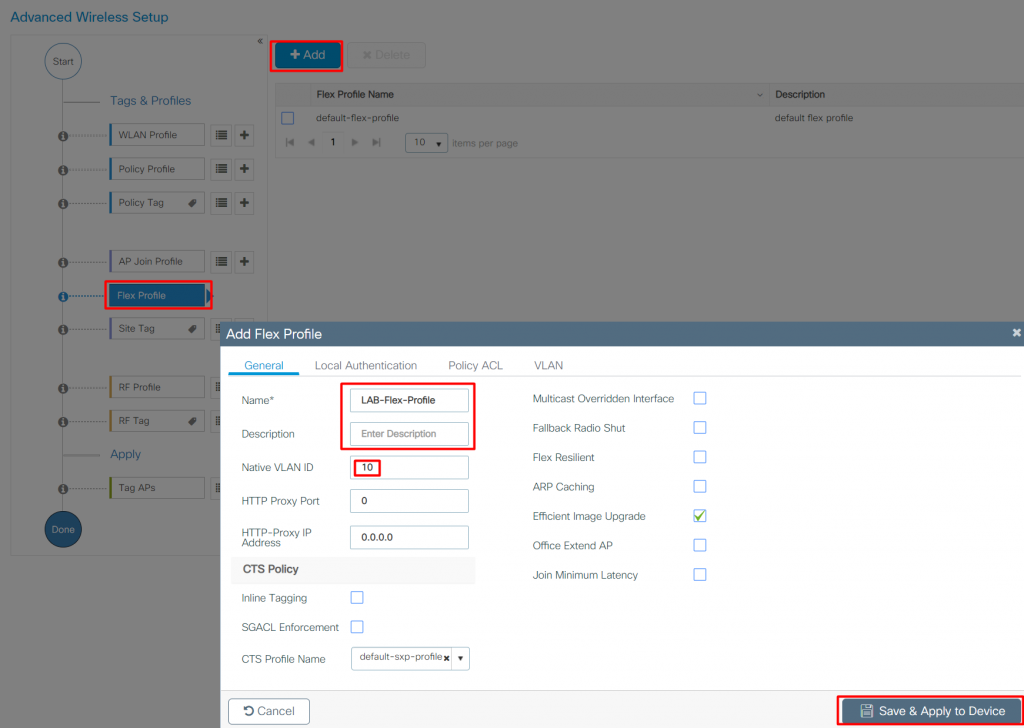


We didn’t have to create Flex Profile for Centrally Switched WLAN, but we will need it here. We can use Flex Profile for many different things, but those are quite important:
- General Tab
- Native VLAN ID – this is where we specify AP mgmt. VLAN that the AP will be sitting in.
- Efficient Image Upgrade – this means that when we upgrade the controller code, it will be pushed to just one Flex AP (called the FlexConnect Master AP in AireOS) tagged with a Site Tag containing the same Flex Profile. The code will then be distributed to the remaining APs locally without the need to transfer it over WAN or Internet multiple times. Neat.
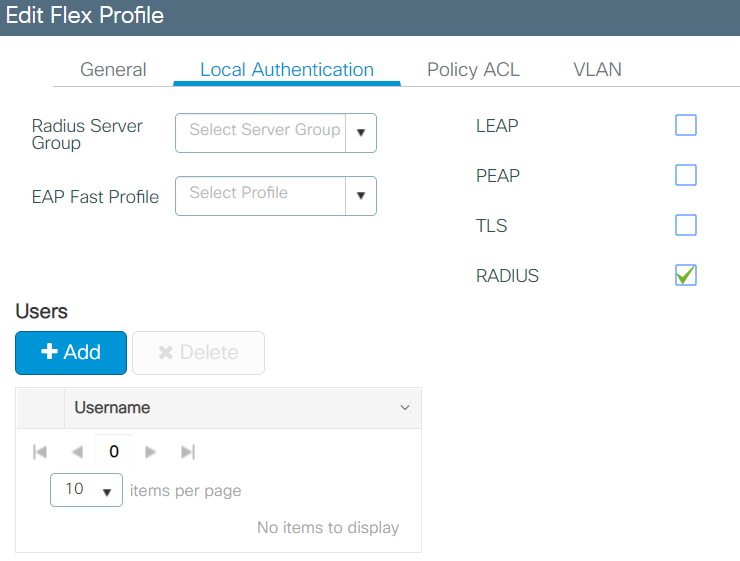
- Local Authentication Tab
- This is where we can specify a RADIUS server local to the AP for wireless clients authentication so it doesn’t have to be central and go through a DC somewhere far far away. Radius Server Group can also be used in a very valid scenario, where the preference is to use central RADIUS for authentication and visibility and switch to local (from AP perspective) RADIUS when the central one is down. EAP based WLANs would gain a survivalability element in case the WLC or communication to the WLC goes down. Existing clients could potentially re-authenticate and new ones could connect but bear in mind that Flex AP and WLAN in not-connected mode (WLC not reachable) would lose access to RRM and roaming optimisation mechanisms.
- Policy ACL Tab
- If you ever want to use any ACLs on APs / WLANs configured as Flex Local Switching, you must create an ACL in ‘Configuration > ACL’ and, on top of that, you MUST add this ACL under ‘Flex Profile > Policy ACL’ tab! By doing so, the specific ACL is pushed down to the AP and can be refered to (statically or via RADIUS).
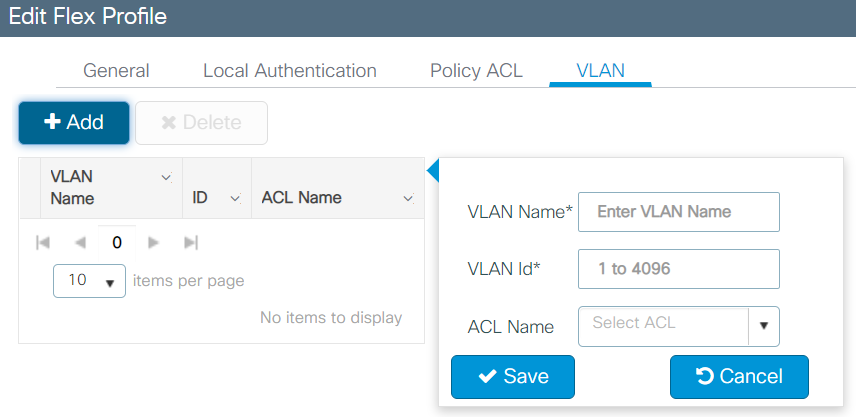
- VLAN Tab
- This is where you can create VLANs that will be pushed down to the AP. Remember VLAN/VLAN Group under Access Policies Tab of the Policy Profile, where we mapped the profile to wireless users’ VLAN 20 using VLAN ID? If we’d like to refer to the VLAN by its name, we would need to have a matching VLAN/name configured here!
7. Create Site Tag

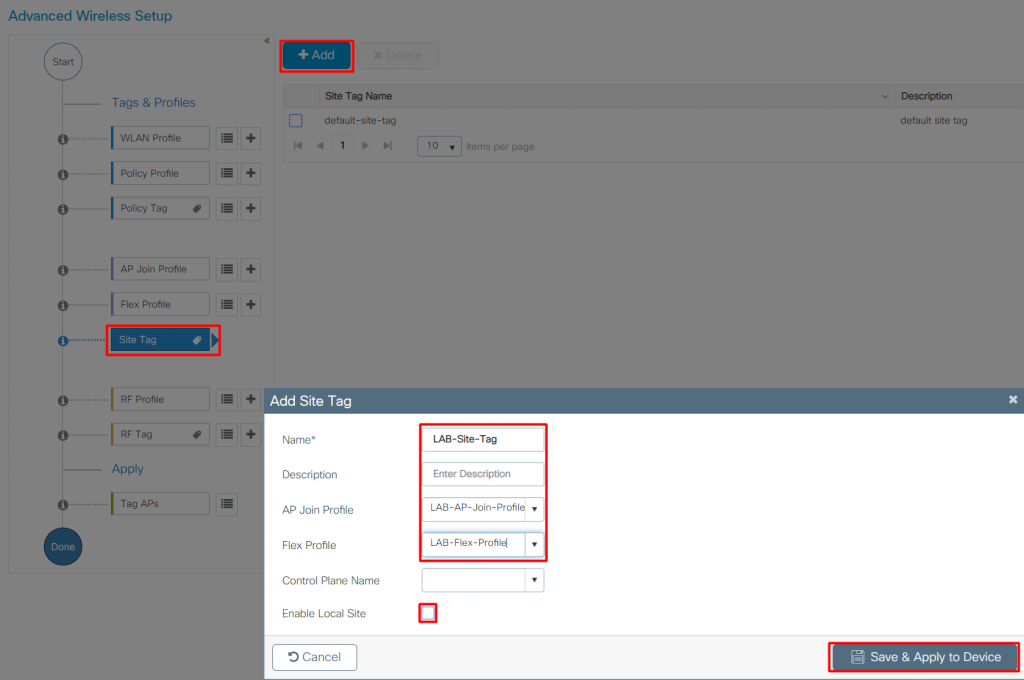
We’ve come to the last place, where Flex relevant config sits! The second we untick “Enable Local Site”, “Flex Profile” dropdown appears. For the AP to join the WLC as a Flex AP, we need to untick “Enable Local Site” and select “Flex Profile” that the AP will use.
8. Create RF Profile (for 2.4 and 5GHz) and RF Tag
Since I created them in our ‘central’ switching blog and didn’t delete them, refer to our blog here to find out more about RF Profiles and Tags.

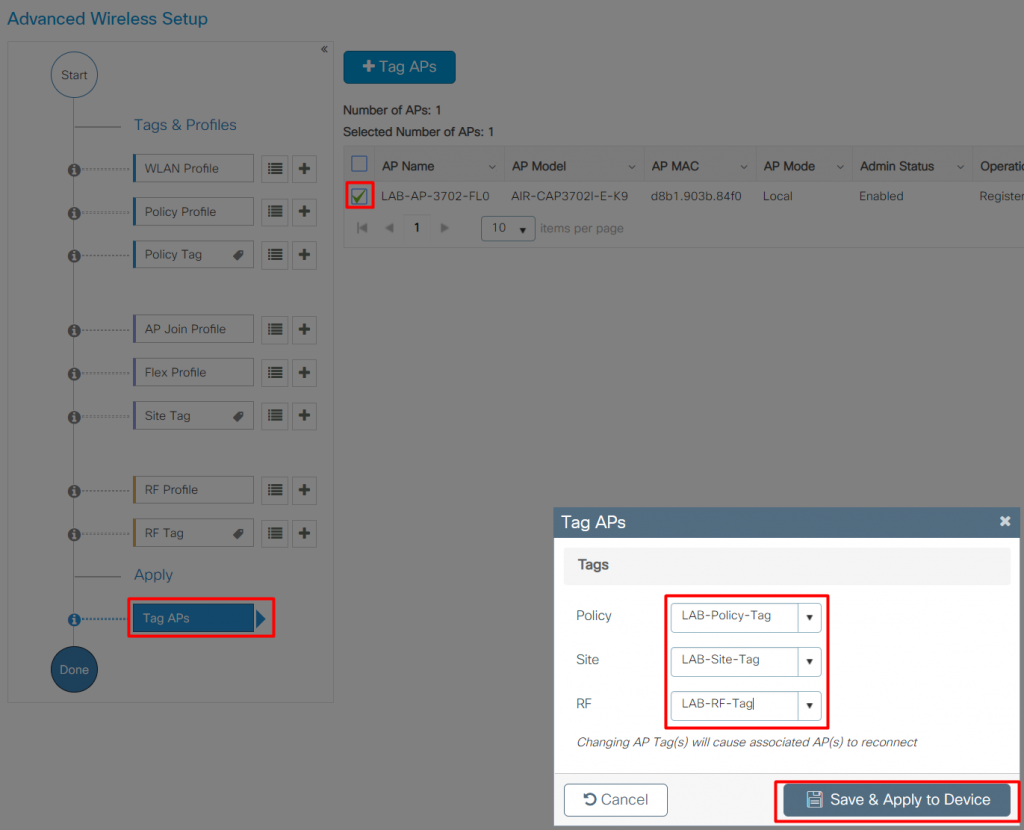
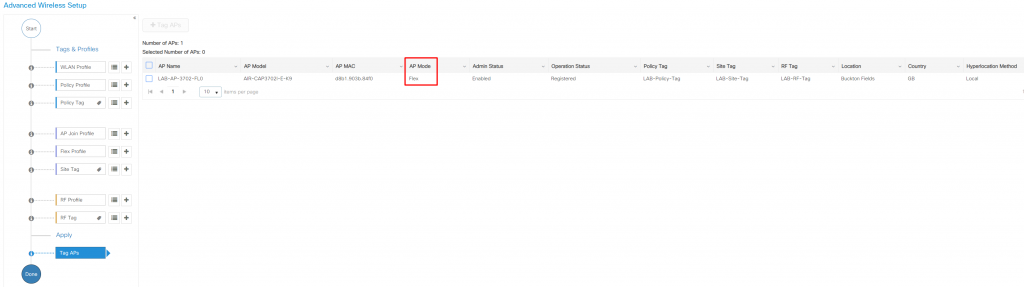
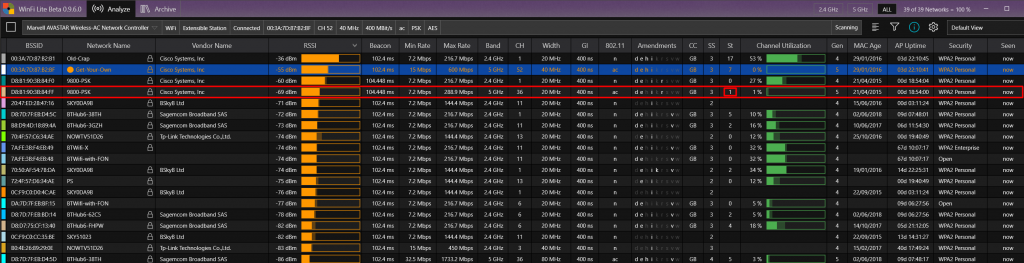
AP(s) will now reboot and should join back as a Flex AP and broadcast our SSID:


That’s it! 🙂 We massively hope it was helpful for someone!
Tons of love,
WiFi Ninjas x