

Hey,
Welcome to our latest WiFi Ninjas blog!
In this post, we will be showing just how quick and easy it is to set up an SSID with Mist and leverage their Multiple PSK feature!
It took me no more than 5 minutes to get everything configured – with 3 x PSKs on the same SSID & connect both of my iPhones & iPad to the 3 multiple PSKs that I configured.
A couple of points & info around Multi PSK:
Now a step by step guide to how I set up my SSID with multiple PSKs.
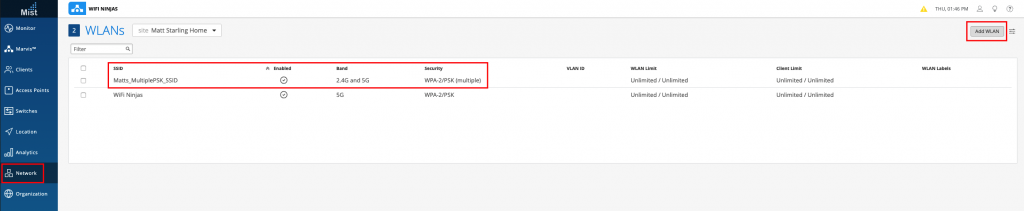
First, we head over to “Network” and we will want to add a new WLAN by hitting the “add WLAN” button in the top right of the dashboard. Once we have added the multiple PSK SSID it will look like this below:
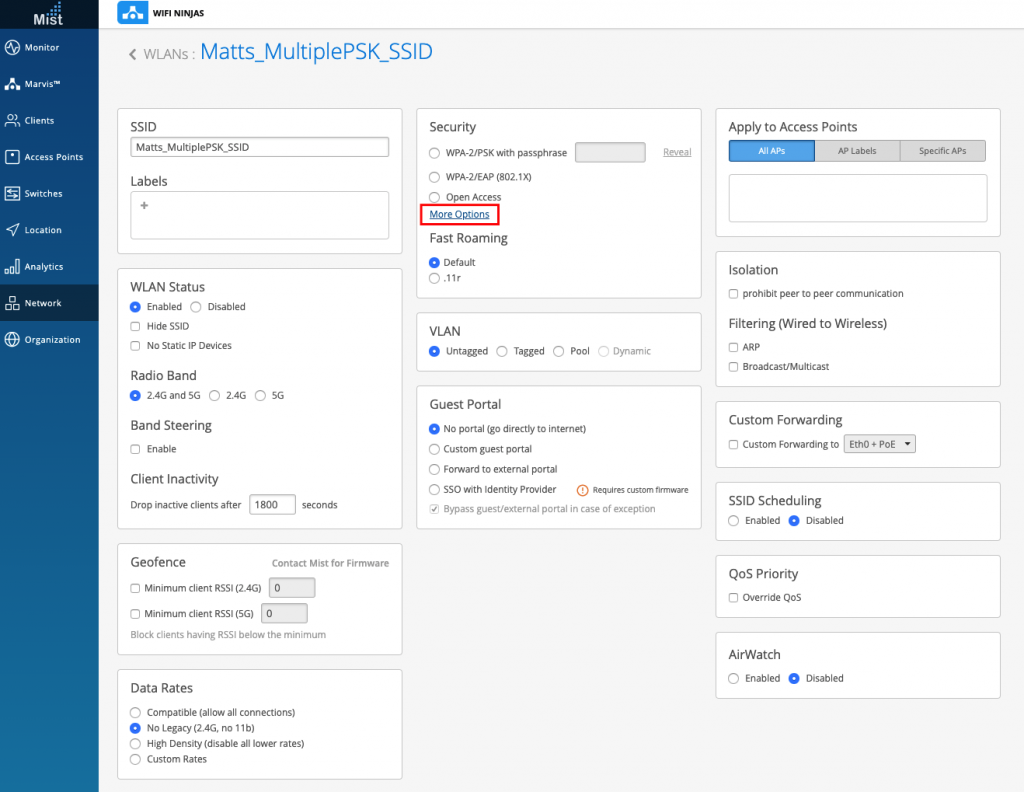
When we are creating the SSID – under security, we need to hit the “More Options” button to reveal some additional WLAN Security features.
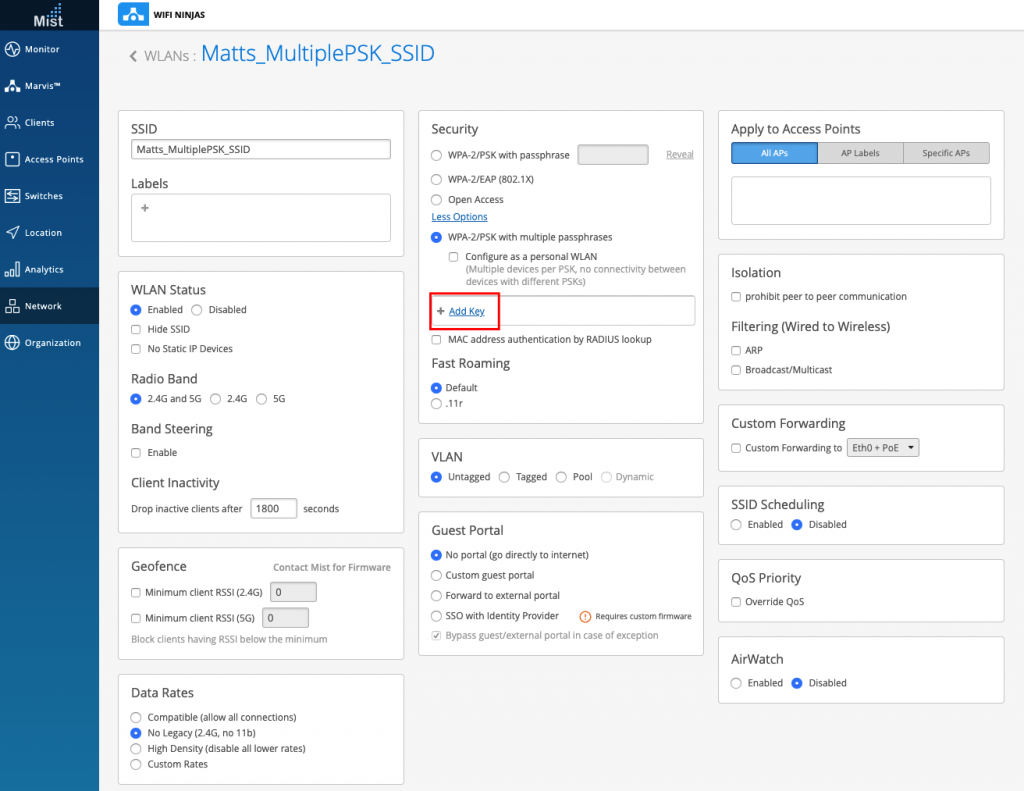
We then select “WPA-2/PSK with multiple passphrases” & then the add key.
Which will then present you with a popup box that will look like this below and we can enter our first Multiple PSK!
We have the option here to input our own or Mist will generate a random secure one for you.
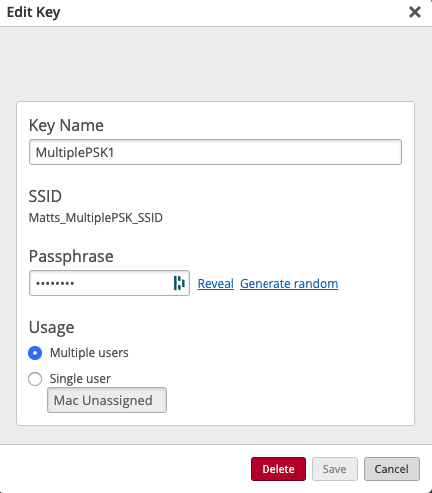
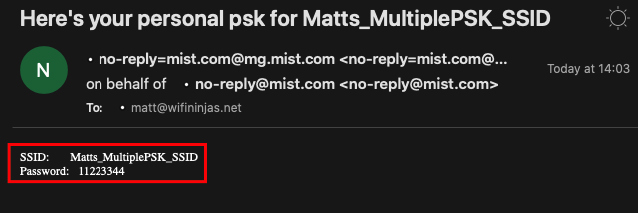
Note if you put the email address as the key name that email will receive the PSK via email from the Mist dashboard.

Email from the Mist dashboard:
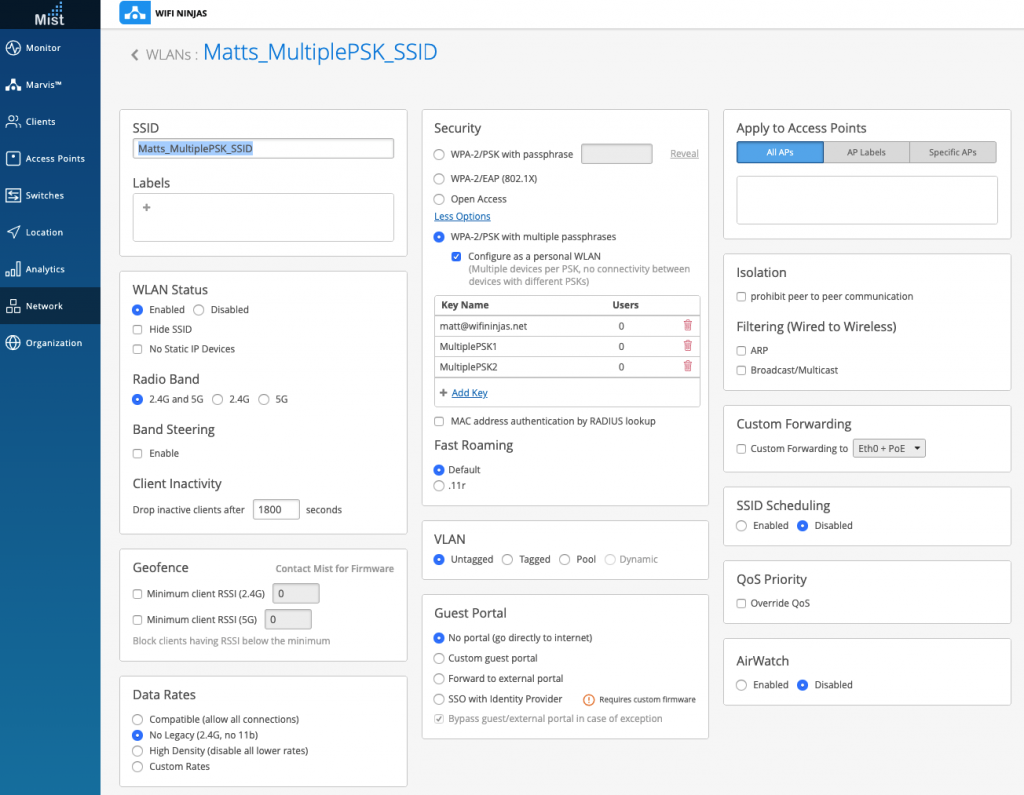
Once you have created all your multiple PSKs the dashboard will look like this and you will be ready to connect multiple devices to the same SSID but using different PSKs to connect. I just created 3 for the purpose of this blog.
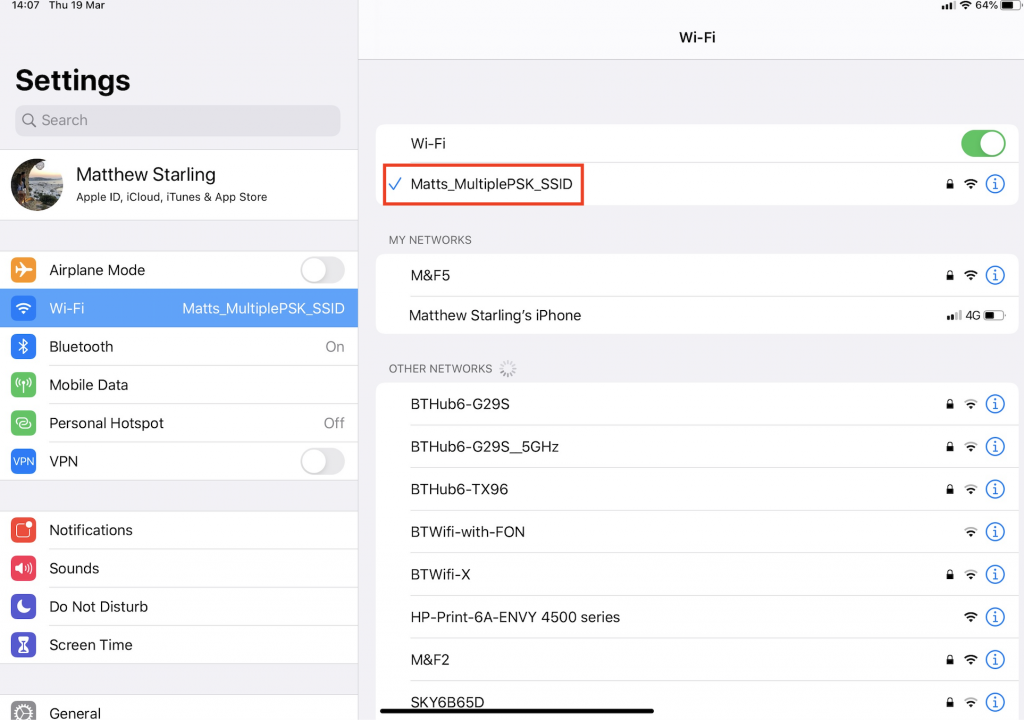
I then connected my iPhone X to the SSID and used one of the MPSKs.
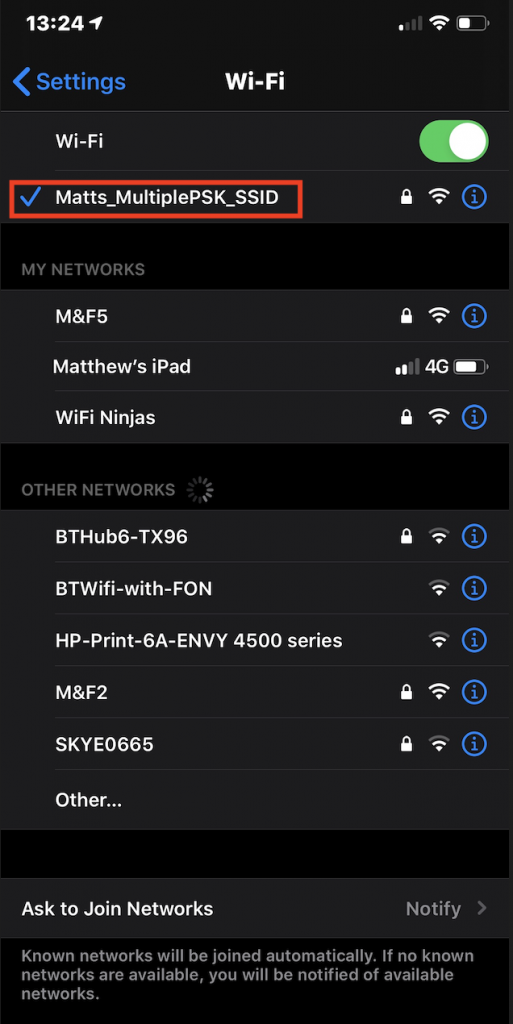
And then connected my iPhone 8 to the same SSID and used the other MPSK.
Also connected my iPad to the MPSK that I set up and sent via email to my matt@wifininjas.net email address:
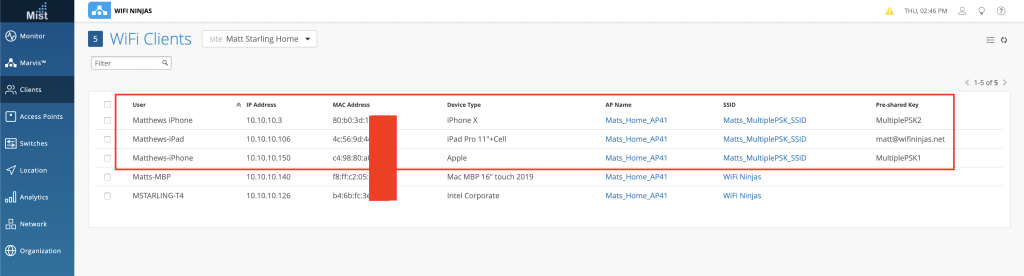
Now that all devices are connected to the SSID – I headed over to the WiFi client’s view on the Mist dashboard, where we can see both of my devices successfully connected and it shows you here which SSID they have connected to but also which PSK they used. In this example, it is MultiplePSK1, MultiplePSK2 & Matt@wifininjas.net.
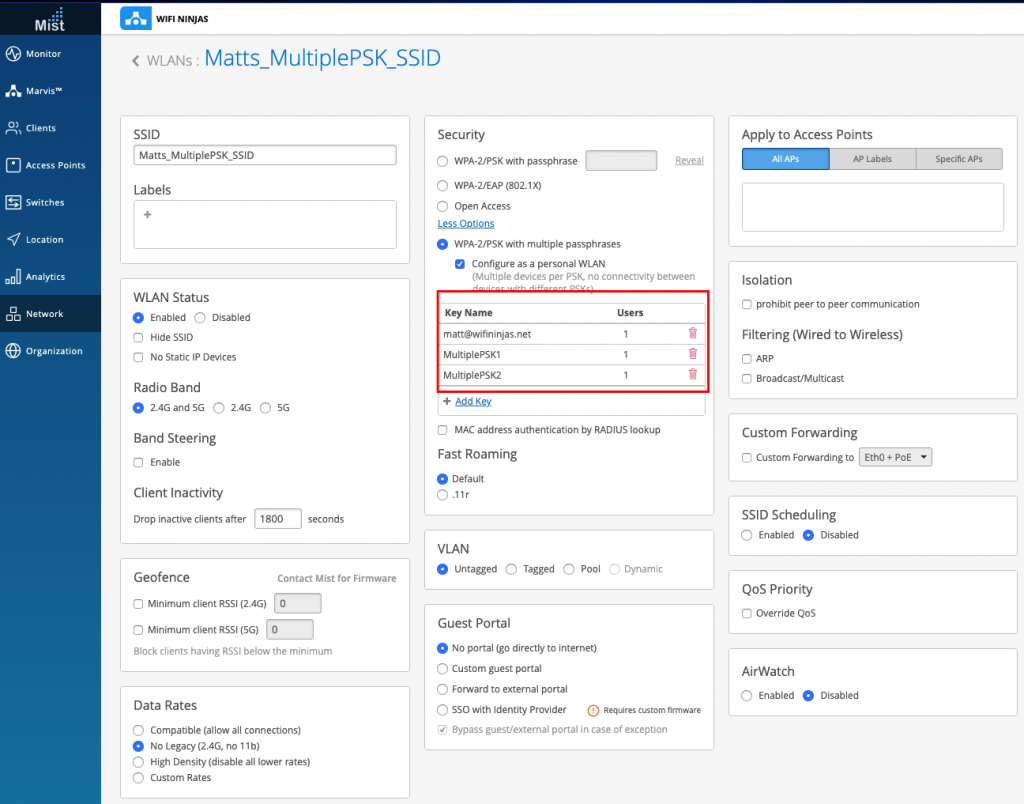
We can also go back to the WLAN and we can see how many users are connected to each of the MPSKs here as well:
That’s all it takes to set up a Multiple PSK SSID with Mist & it took me less than 5 minutes to get this set up and working in my environment.
Again another amazing feature from Mist that is very simple & easy to set up something which is so powerful & useful for your wireless network. This lets you have accountability & improved security to your PSK wireless networks which I personally think is a much better option than using captive portals with open authentication or an SSID with a single PSK for all users.
I hope you enjoyed this blog and if you have your own Mist AP at home or you use it currently in your production network – give setting up a Multiple PSK SSID a go and let me know your feedback!
Much love, as always – WiFi Ninjas x