

Hey!
Welcome to our latest blog, today we will be showing you how to configure a Cisco C9800 WLC to use the “MPSK” (Multi Pre Shared Key) feature.
Multi-PSK feature supports multiple PSKs simultaneously on a single SSID. You can use any of the configured PSKs to join the network. This is different from the Identity PSK (iPSK), wherein unique PSKs are created for individuals or groups of users on the same SSID.
Restrictions on Multi-PSK:
For more information around central and local authentication check out our C9800 WLC series where we have covered nicely the difference between these methods of authentication.
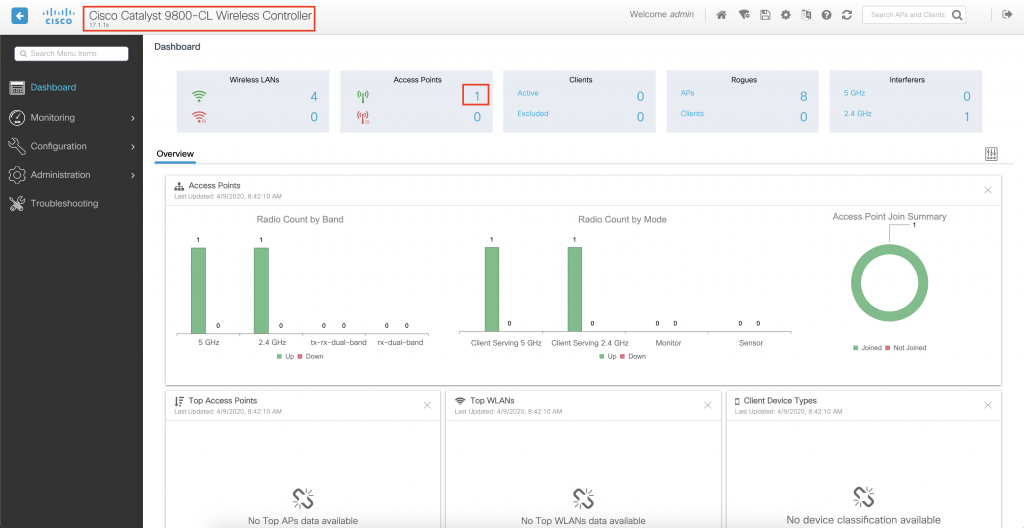
Let’s take a look at my lab set up – I am running a virtual C9800-CL and it is on version 17.1.1s.
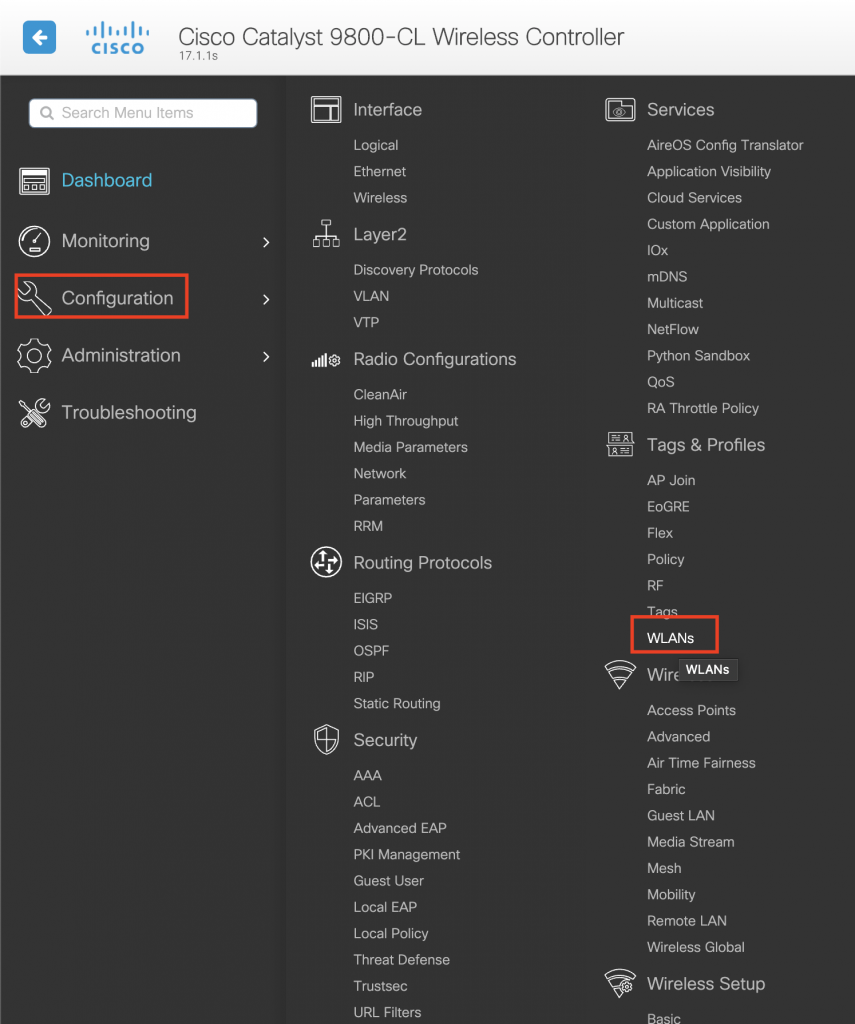
Now we will show you where you need to go to configure your WLAN to use the MPSK feature. First click on the “configuration” tab on the left and then we will select “WLANs” which is under the Tags & Profiles.
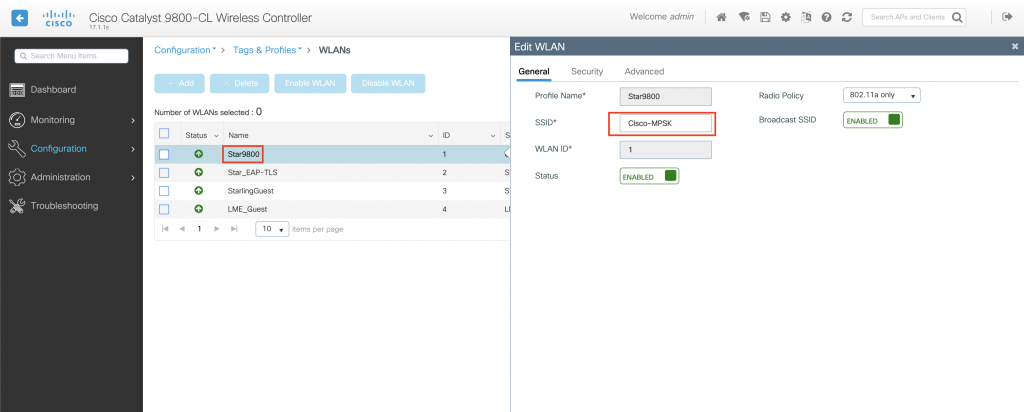
Then either pick one of your already created WLANs or create a new WLAN – in this example, I have called my SSID “Cisco-MPSK”. Once selected move on to the “security” tab inside of the WLAN.
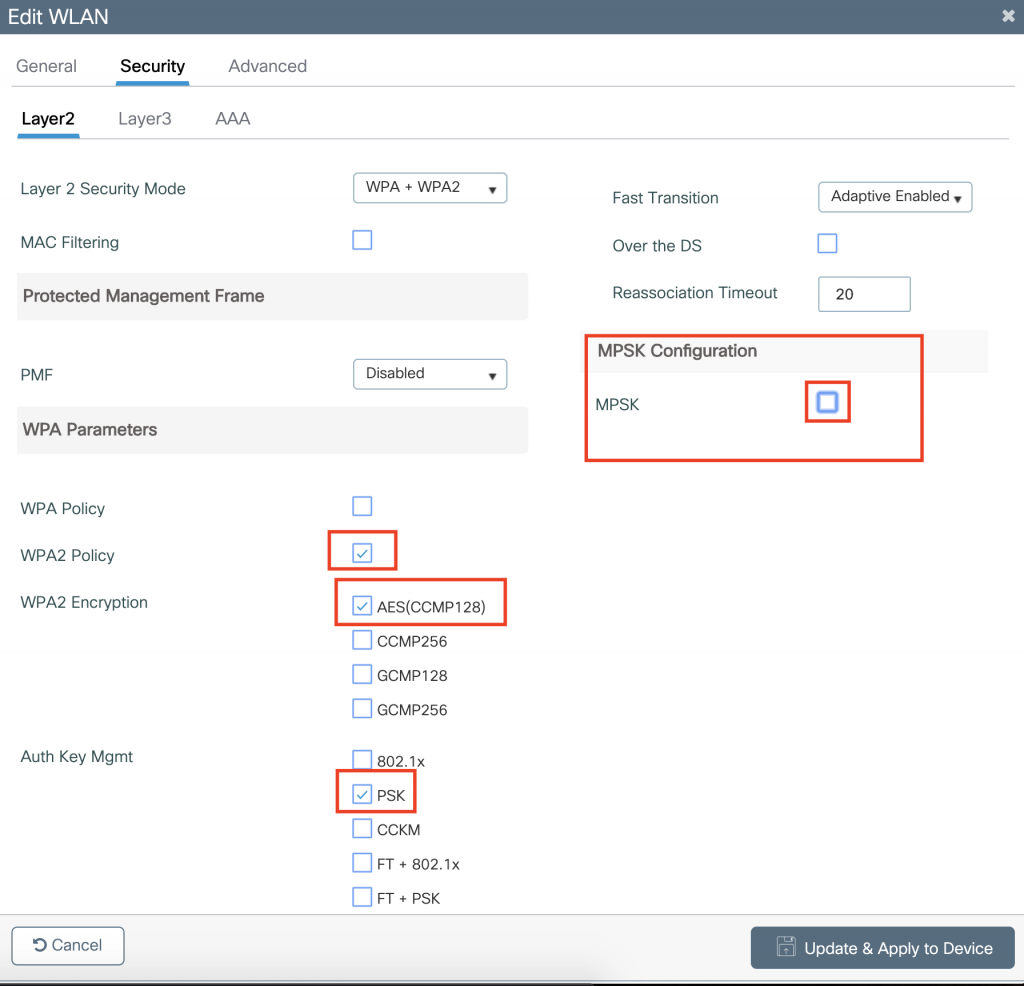
Inside of here we will see many options, under “layer2” we want to make sure that we have the following WPA2 check boxes highlight below selected and then we can enable MPSK.
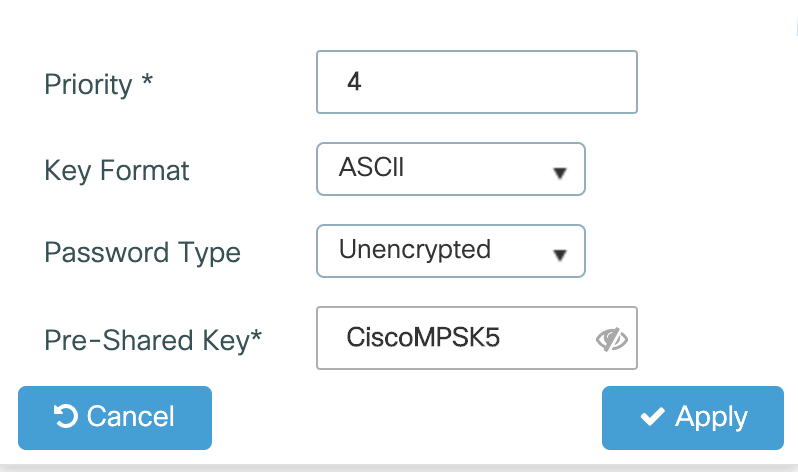
When you enable MPSK you will be able to start adding your MPSK’s and this is what the configuration box will look like. You will have the option to select the priority (remember 0 is the highest priority), which key format you want to use, if you would like the password type to be encrypted or unencrypted & then finally whatever you would like your MPSK to be.
When you have finished entering all of your MPSKs (remember we can have a maximum of 5) this is what your configuration will look like.

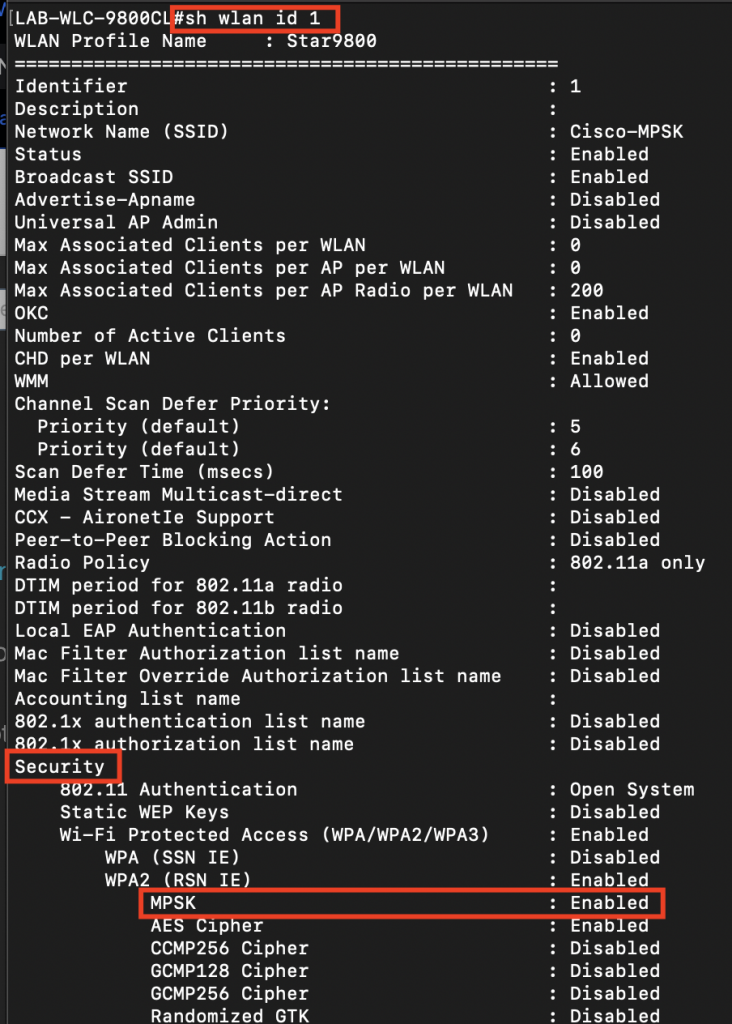
We can also verify that MPSK has been successfully enabled via the CLI.
If you run the following command – “#show wlan id 1” (You will need to make sure that you use the relevant WLAN ID number for your WLAN that you configured MPSK for)
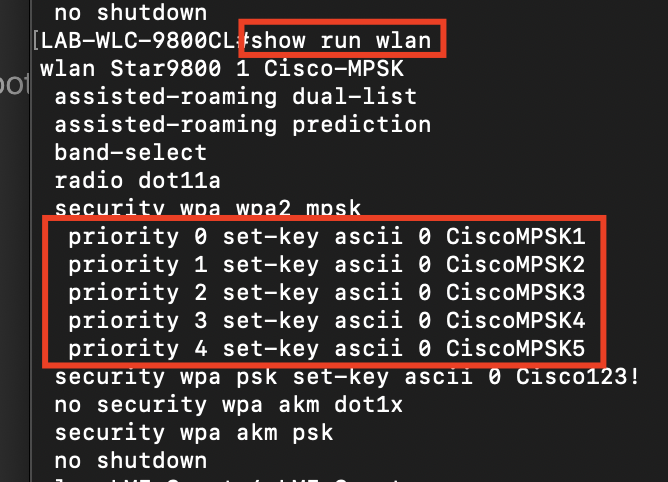
Also we can run the “#show run wlan” command and we will be able to see here that MPSK is enabled on your WLAN and what keys are in use.
Ok, so now that we have verified that everything is configured as we are expecting it to be – let’s connect a couple of clients to make sure it works!
In this demo I used my two iPhones to connect to the MPSK and used a different MPSK for each iPhone and they connected first time without any issues at all. You can verify your connected clients in multiple ways on the Cisco C9800.
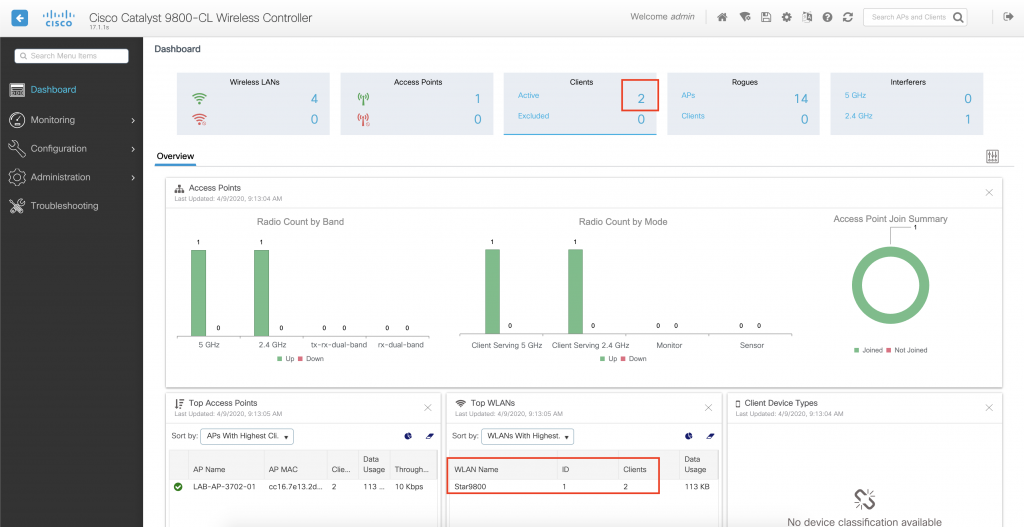
First of all right from the dashboard we can see my Top WLANs which is the profile Star9800 (this is the profile I configured the Cisco-MPSK) under and we can see that I have two clients connected. We can drill down further by clicking on this WLAN, or alternatively we can go to Monitoring > Wireless > Clients.
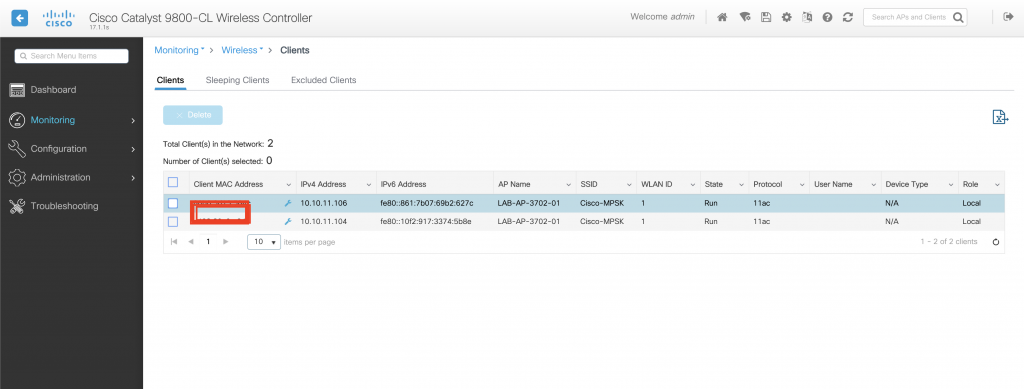
This is the view once we have gone to the Monitoring > Wireless > Clients view and we can see my two iPhones connected, their IP address’, which AP & SSID they are associated to & that they are in the run state.
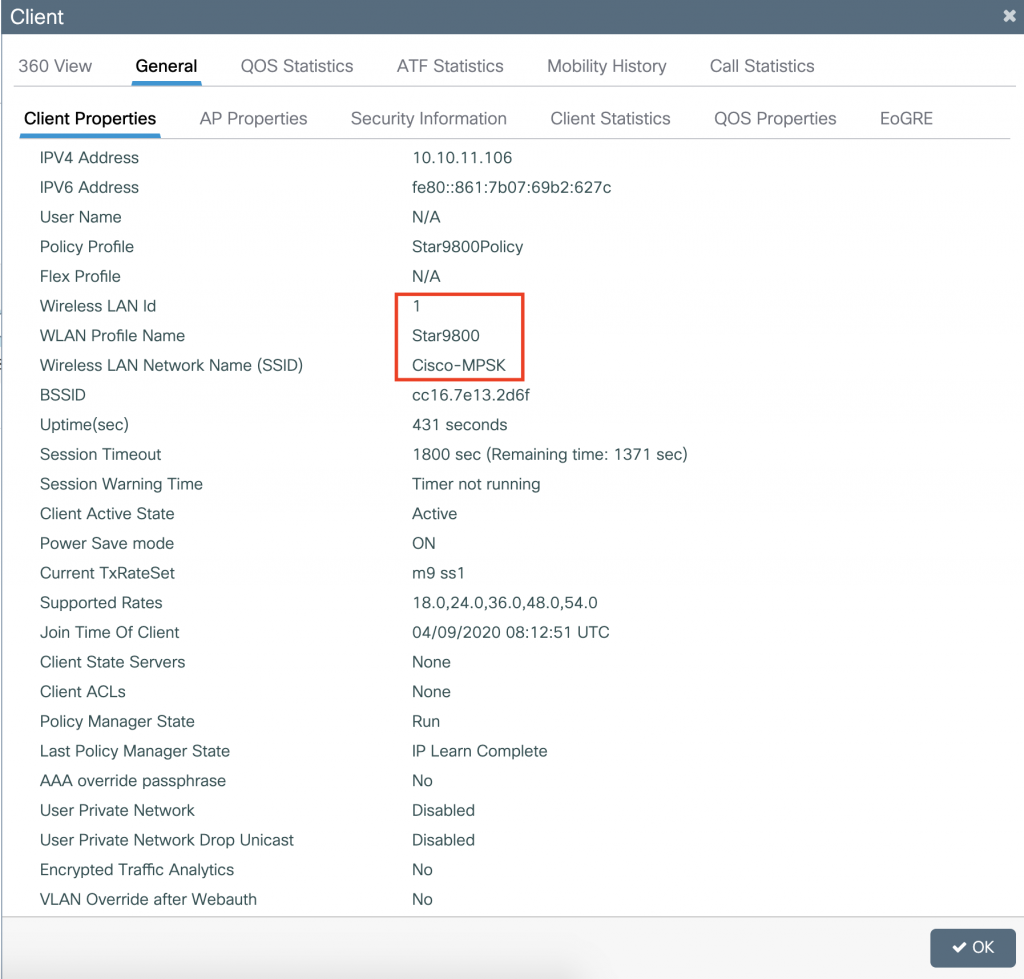
If you click on one of the devices you can drill down even further to get more details & statistics for the client and this is what that view would look like.
Again, if you are a CLI kind of person we can verify the connected devices on CLI by using the following command – “#show wireless client summary”

There you go, that is just how simple & easy it is to set up MPSK on your Cisco C9800 WLC – something which is so powerful & useful for your wireless network. This lets you have accountability & improved security to your PSK wireless networks which I personally think is a much better option than using captive portals with open authentication or an SSID with a single PSK for all users.
I hope you enjoyed this blog and if you have your own Cisco C9800 AP at home or you use it currently in your production network – give setting up a MPSK SSID a go and let me know your feedback!
Much love, as always – WiFi Ninjas x